We are proud to announce that we will be at the computer graphics conference SIGGRAPH Asia 2018 this December, where we will present the techniques used to create our 64K intro, H – Immersion.
At the conference, the “Computer Animation Festival” celebrates storytelling and animation in general, and showcases some of the best works of the year. We are honoured to have been selected among the talks there, and still in disbelief to be sitting next to talks about Pixar’s Incredibles 2 or Solo: A Star Wars Story.
If you are attending SIGGRAPH Asia this December in Tokyo, come to our session on Thursday 6th of December, from 16:15 to 18:00, in room G502 (glass building, fifth floor). All the details are available on the SIGGRAPH Asia 2018 session description. There is an iCalendar file as well.
When making an animation within only 64kB, using images is tricky. We can’t store them in a traditional way, because it is not efficient enough, even with a compression like JPEG. An alternative solution is procedural generation. It consists in using code to describe how to create the images at runtime. Our implementation of such a solution is the texture generator, a core part of our toolchain. In this post we will present how we designed it and how we used it in H – Immersion.
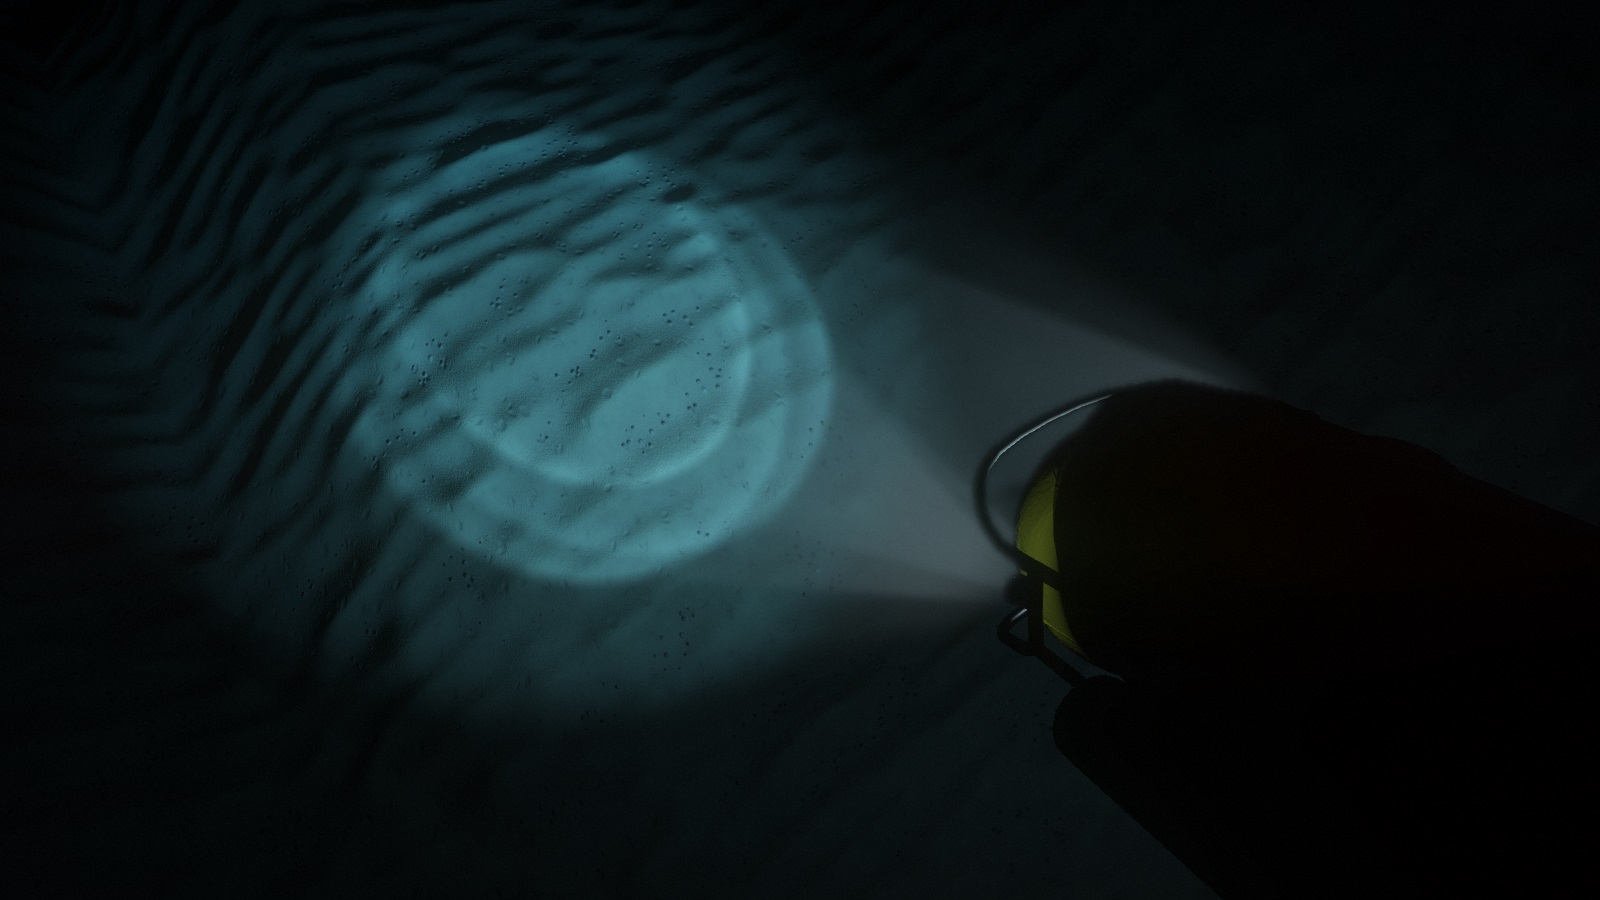
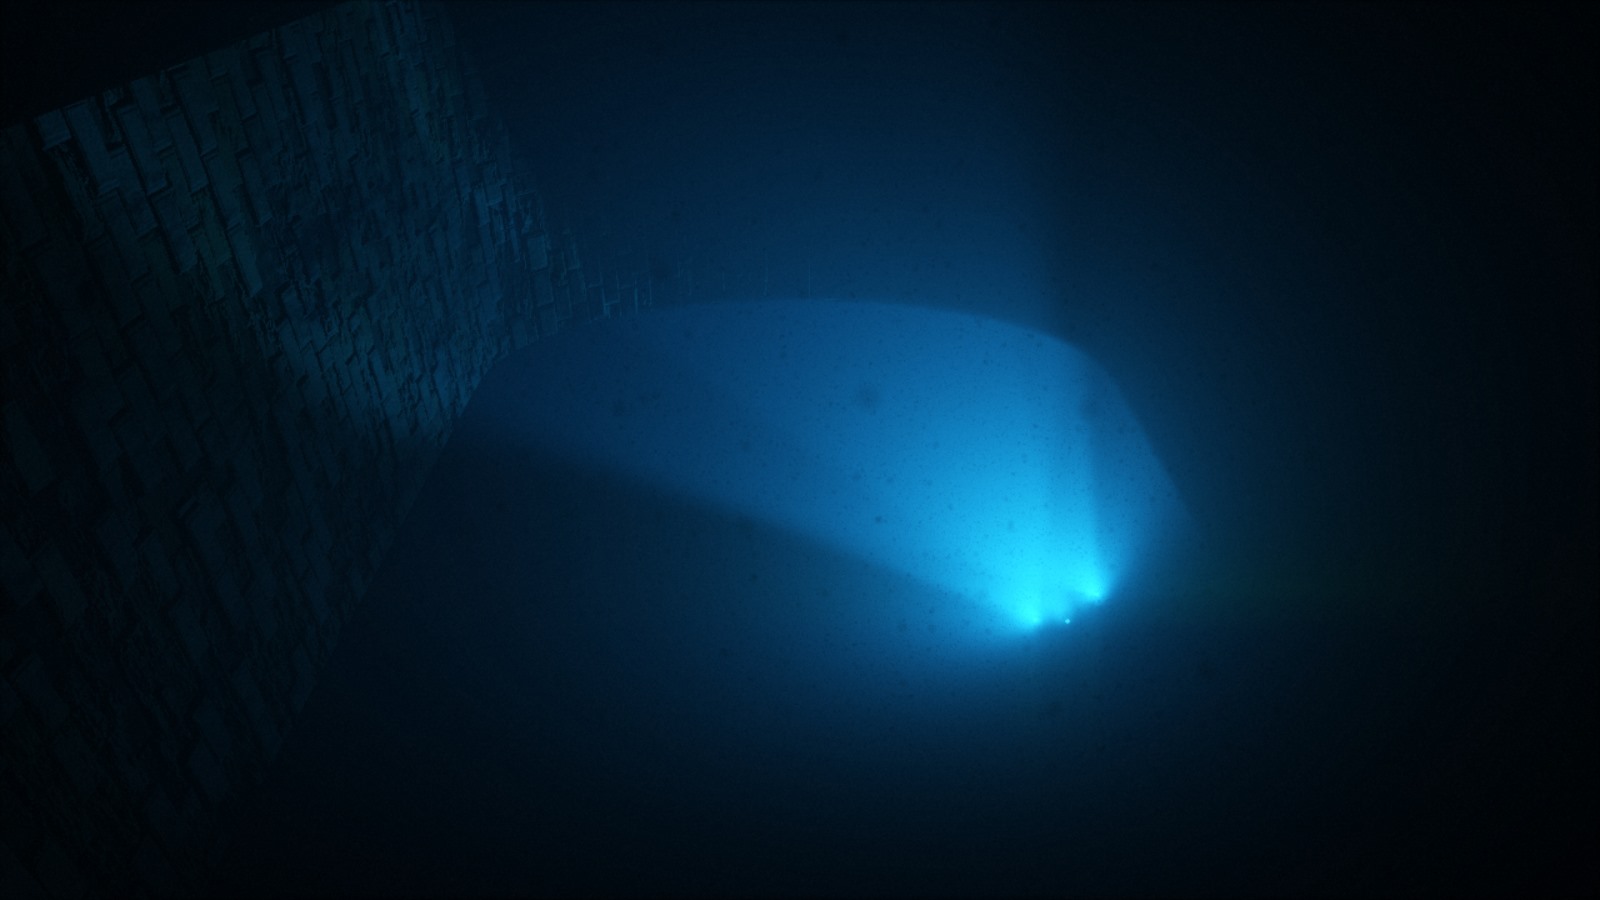
The spotlights of a submersible reveal details of the seafloor.
Early version
Texture generation has been one of the earliest elements of our code base: our first intro, B – Incubation, already had procedural textures. The code consisted in a set of functions to fill, filter, transform and combine textures, and one big loop to go over all the textures. Those functions were written in plain C++, but were later exposed with a C API so they could be evaluated by a C interpreter, PicoC. At the time, we were using PicoC in an effort to reduce iteration time: in this case it allowed to modify and reload the textures at runtime. Limiting ourselves to the C subset was a small price to pay for the ability to change code and see the result without having to quit, compile and reload the entire demo again.
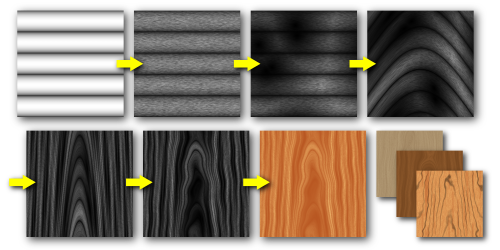
With a simple pattern, some noise and some deformation, we can obtain a stylized wood texture.
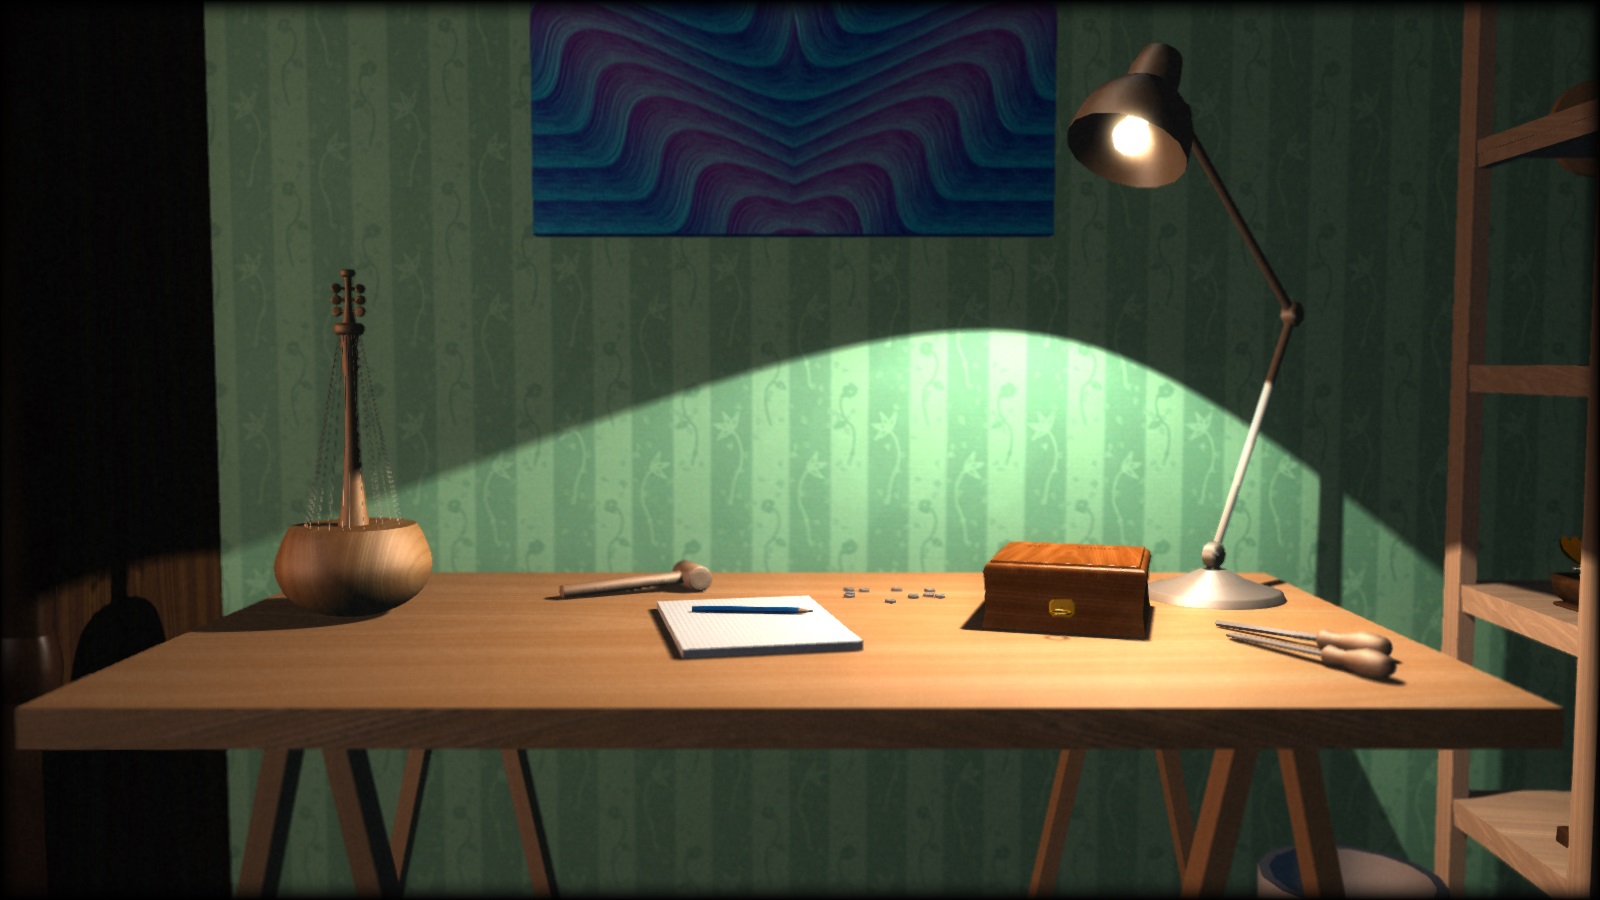
Various wood textures are used in this scene from F – Felix’s workshop.
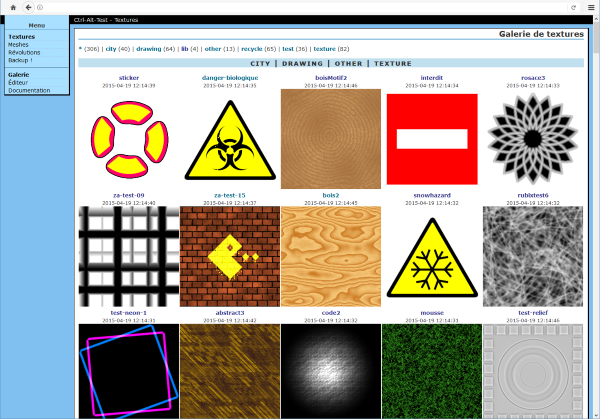
We explored for a while what we could do with that generator, and ended up putting it on a web server with a small PHP script behind a simple web interface. We would write texture code in a text field, the script would feed it to the generator, which would then dump the result as a PNG file for the page to display. Soon enough, we found ourselves doodling from the office during lunch breaks and sharing our little creations among group members. This interaction was very motivating for creativity.
Our old texture generator web gallery. All the textures were editable in the browser.
A complete redesign
For a long time the texture generator almost didn’t change; we thought it was fine and our efficiency plateaued. Then we woke up one day, and discovered that Internet forums were suddenly full of artists showing off their 100% procedurally generated textures and challenging each other with themes. Procedural content used to be a demoscene thing, but Allegorithmic, ShaderToy and the likes had now made it accessible to the crowd while we had not been paying attention, and they were beating us hard. Unacceptable!
Fabric Couch
Forest Floor
It was long due time to reevaluate our tools. Fortunately working with the same texture generator for several years had given us time to understand its flaws. Our nascent mesh generator was also giving us some additional perspective on what we wanted a procedural content pipeline to look like.
The most important architecture mistake was the implementation of generation as a set of operations on textures objects. From a high level perspective, it may be a correct way of viewing it, but at the implementation level, having functions like texture.DoSomething() or Combine(textureA, textureB) has severe drawbacks.
First, the OOP style requires to declare those functions as part of the API, no matter how simple they are. This is a major problem because it doesn’t scale well and more importantly, it creates friction in the creation process. We don’t want to change the API every time we try something new. It makes experimentation more difficult, and ultimately limits artistic creativity.
Second, in terms of performance, it forces to loop over texture data as many times as there are operations. It wouldn’t matter too much if those operations were expensive relative to the cost of accessing large chunks of memory, however that’s usually not the case. Except for a few operations like generating a Perlin noise or doing a flood fill, most are in fact very simple and require few instructions per texture point. This means we keep traversing texture data to do trivial operations, which is ridiculously cache inefficient.
The new design addresses those issues with a simple reorganization of the logic. In practice, the majority of the functions just do the same operation for each element of the texture, independently. So instead of writing a function texture.DoSomething() which goes through all the elements, we can write texture.ApplyFunction(f) where f(element) only works on a single texture element. f(element) can then be written ad hoc for a specific texture.
This seems to be a minor modification. Yet doing so simplifies the API, makes the generation code more flexible and more expressive, is more cache friendly and trivially parallelizable. Many of you readers will probably recognize this as being essentially… a shader. Although the implementation is still, in fact, C++ code running on the CPU. We also keep the ability to do operations outside of the loop like before, but we only use that option when it is relevant, for example when doing a convolution.
Before:
// Logic is at the texture level.
// The API is bloated.
// The API is all there is.
// Generation of a texture has many passes.
class ProceduralTexture {
  void DoSomething(parameters) {
    for (int i = 0; i < size; ++i) {
      // Implementation details here.
      (*this)[i] = …
    }
  }
  void PerlinNoise(parameters) { … }
  void Voronoi(parameters) { … }
  void Filter(parameters) { … }
  void GenerateNormalMap() { … }
};

void GenerateSomeTexture(texture t) {
  t.PerlinNoise(someParameter);
  t.Filter(someOtherParameter);
  … // etc.
  t.GenerateNormalMap();
}
After:
// Logic is usually at the texture element level.
// The API is minimal.
// Operations are written as needed.
// Generation of a texture has a reduced number of passes.
class ProceduralTexture {
  void ApplyFunction(functionPointer f) {
    for (int i = 0; i < size; ++i) {
      // Implementation passed as a parameter.
      (*this)[i] = f((*this)[i]);
    }
  }
};

void GenerateNormalMap(ProceduralTexture t) { … }

void SomeTextureGenerationPass(void* out, PixelInfo in) {
  result = PerlinNoise(in);
  result = Filter(result);
  … // etc.
  *out = result;
}

void GenerateSomeTexture(texture t) {
  t.ApplyFunction(SomeTextureGenerationPass);
  GenerateNormalMap(t);
}
Parallelization
Generating textures takes time, and an obvious candidate for reducing that time is to have parallel code execution. At the very least, it is possible to generate several textures concurrently. This is what we did up to F – Felix’s workshop and it greatly reduced loading time.
However, doing so doesn’t shorten generation time where we most want it. Generating a single texture still takes as much time. That affects editing, when we keep reloading the same texture again and again between each modification. It is preferable to parallelize the inner texture generation code instead. Since the code now essentially consists in just one big function applied in a loop to each texel, parallelization becomes very simple and efficient. The cost of experimenting, tweaking and doodling is reduced, and that directly impacts creativity.
A damaged mosaic texture for H – Immersion
A mosaic texture for H – Immersion
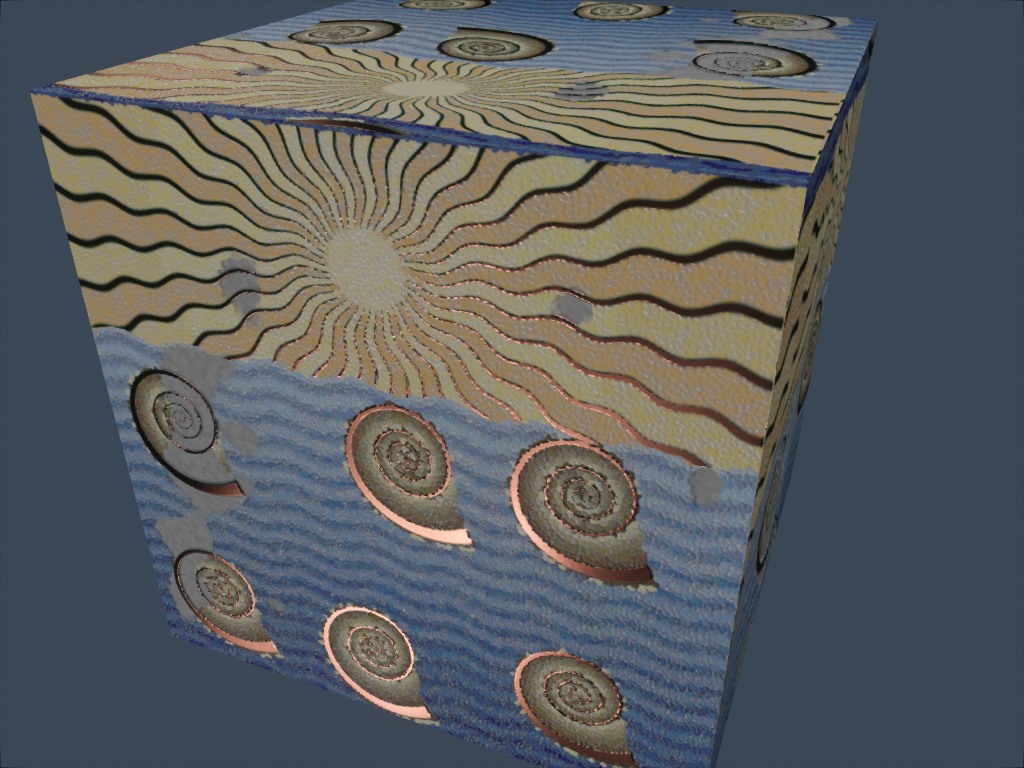
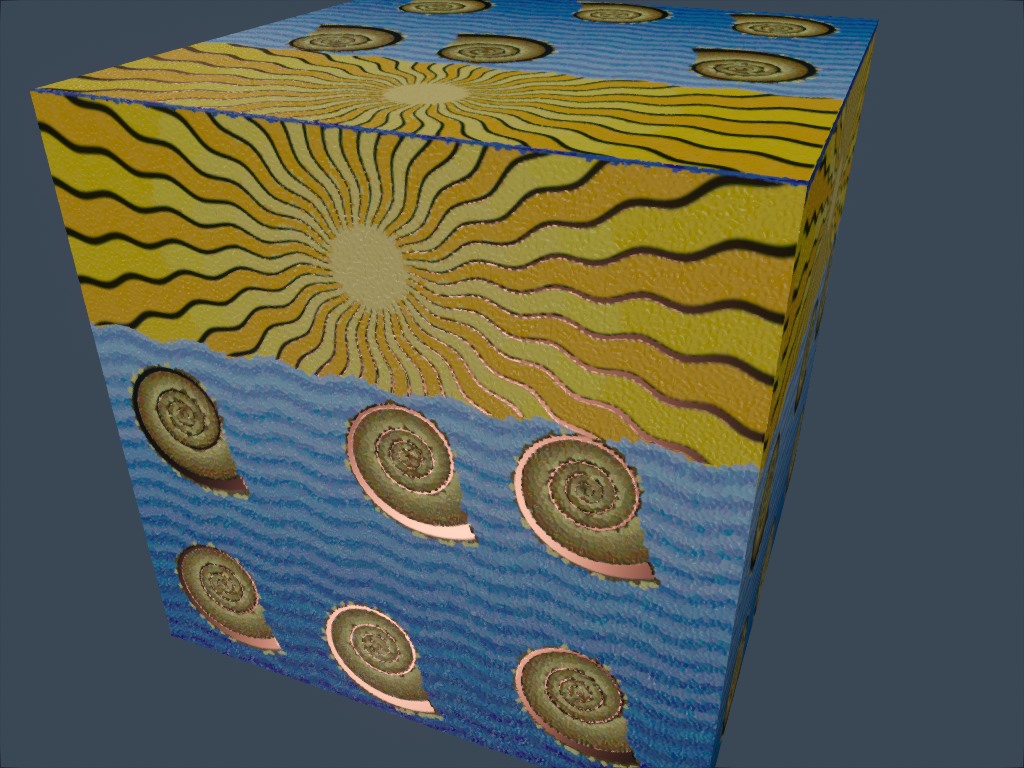
This illustration is an idea that we explored and abandoned for H – Immersion: a mosaic decoration with orichalcum lining. It is shown here in our live editing tool.
GPU side generation
In case it isn’t completely clear in the paragraphs above, texture generation is done entirely on the CPU. At this point some of you might be staring at these lines with incredulity and thinking: “But, why?!”. Generating textures on the GPU would seem like the obvious thing to do. For starters it would likely speed up generation by an order of magnitude. So, why?
The main reason is that it was a smaller step of redesign to stay on CPU. Moving to GPU would have been more work. It would have required to solve additional problems, new problems we don’t have enough experience with yet. On CPU we had a good understanding of what we wanted and how to fix some of the earlier mistakes.
The good news however, is that with the new design it now seems fairly trivial to experiment with GPU side generation as well. In the future, testing combinations of both could be an interesting path to explore.
Texture generation and physically based shading
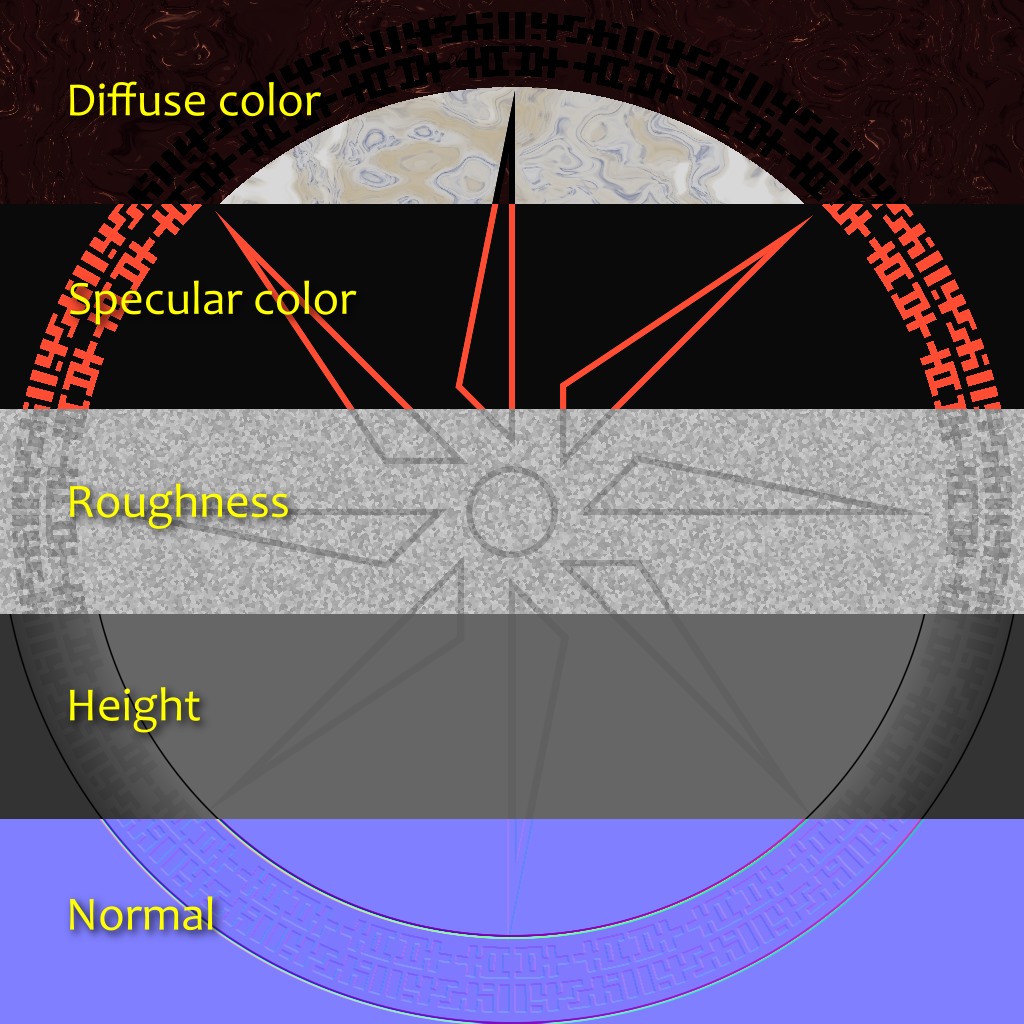
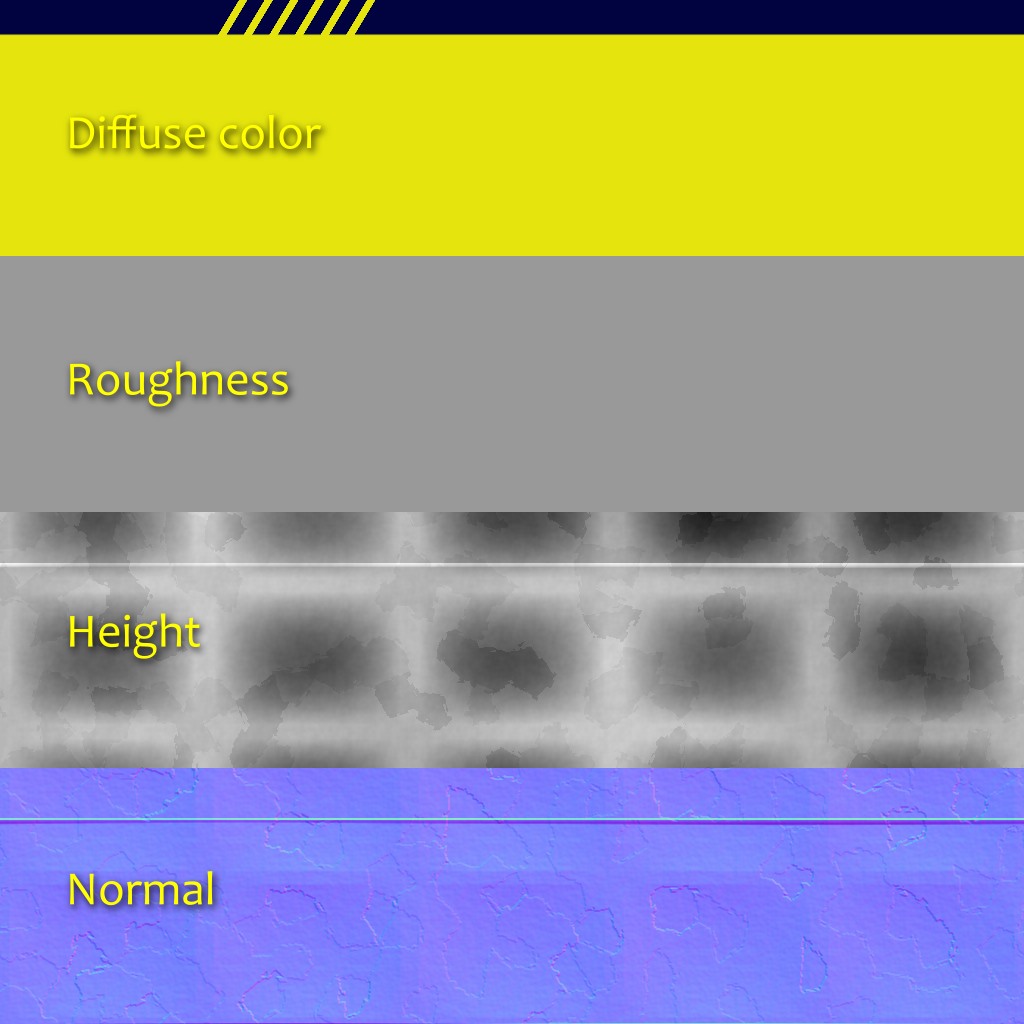
Another limitation of the old design was that a texture was considered to be just an RGB image. If we wanted to generate more information, say, a diffuse texture and a normal texture for a same surface, nothing was preventing us from doing that, but the API wasn’t actively helping either. This takes special importance in the context of Physically Based Shading (PBR).
In a traditional non-PBR pipeline, surfaces typically use color textures in which a lot of information is baked. Those textures often represent the final appearance of the surface: they already have some volume, the crevices are darkened, and they may even have some reflection highlights. If more than one texture is used at a time, it’s usually to combine details of large and small scale, to add normal mapping, or to represent how reflective the surface is.
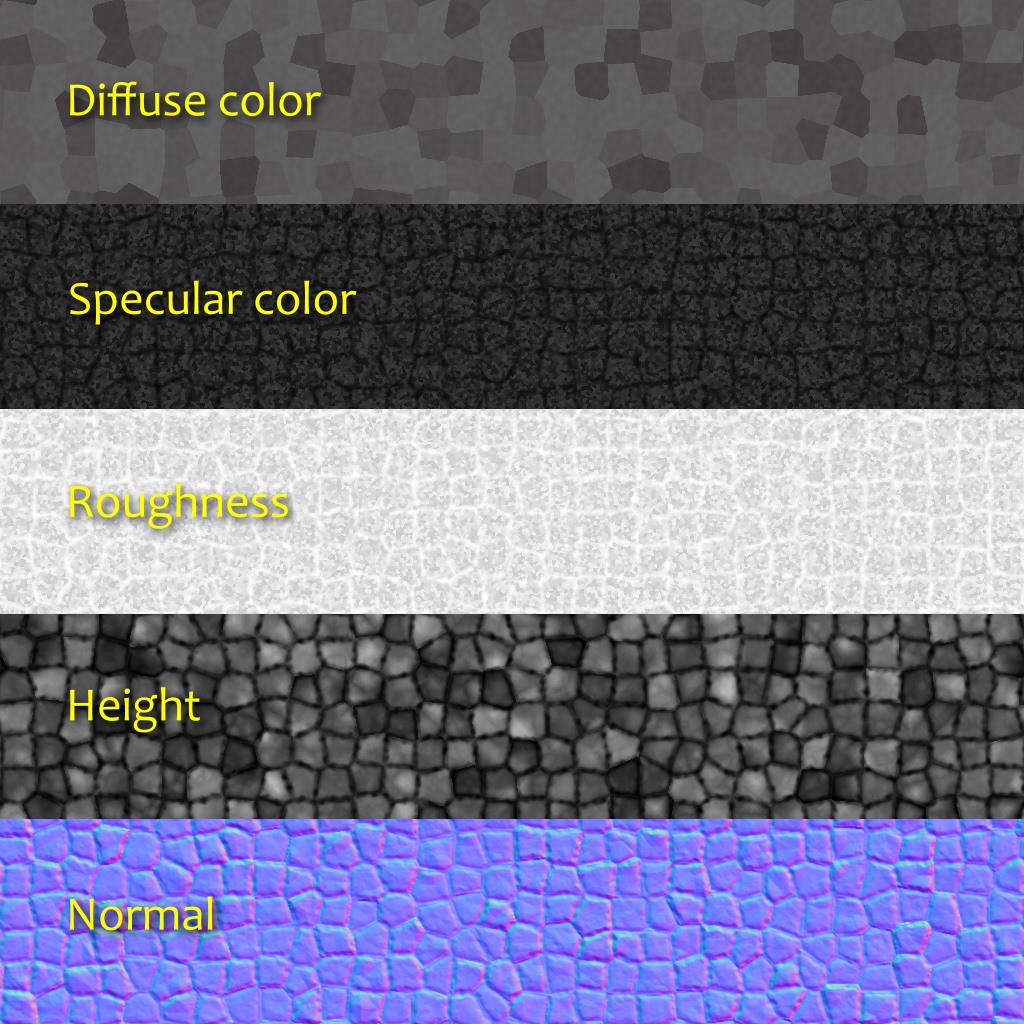
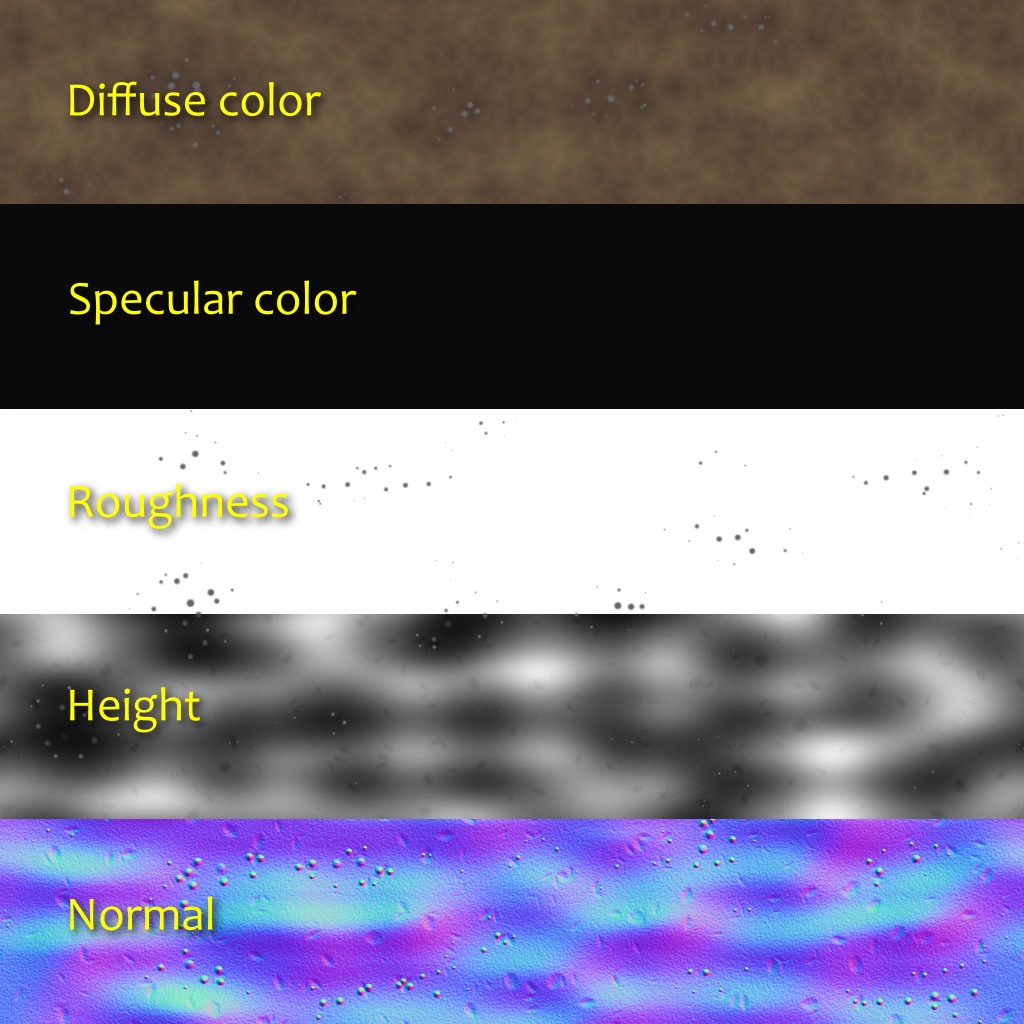
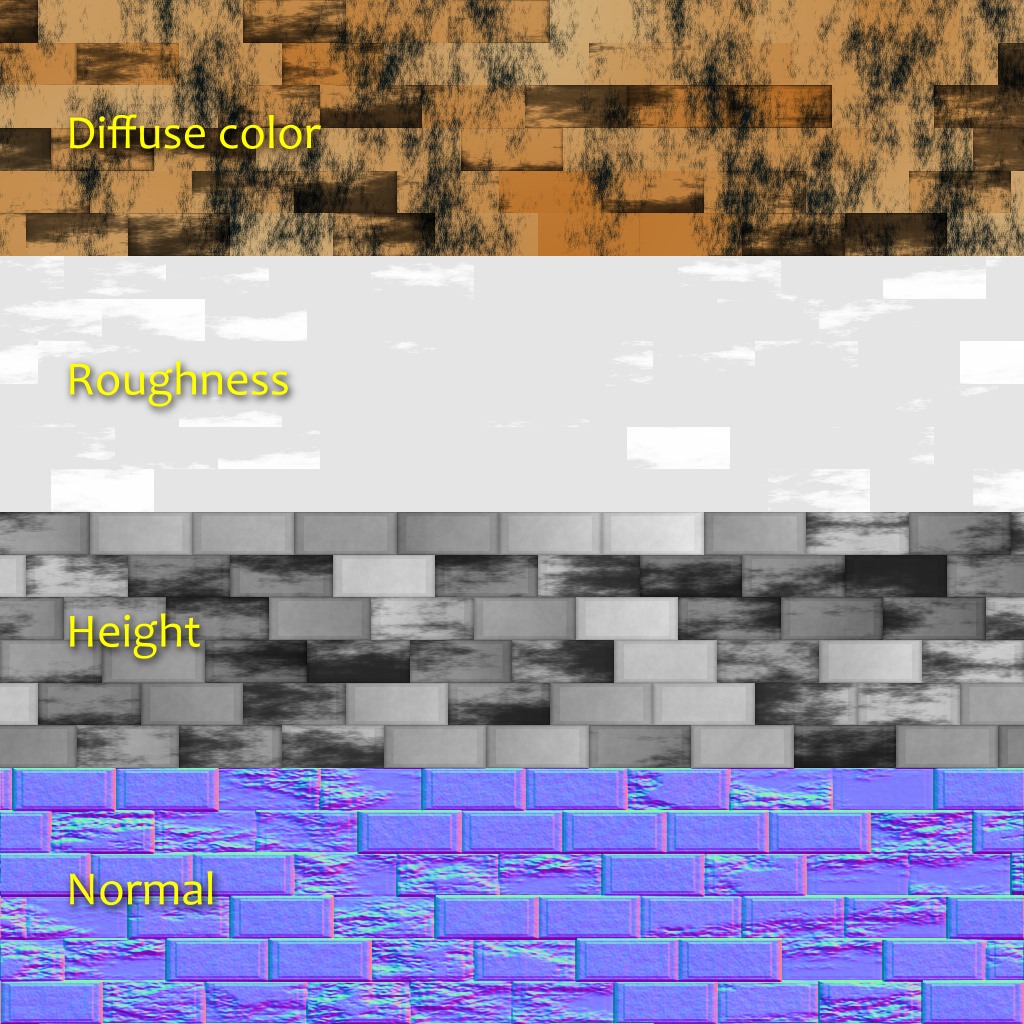
In a PBR pipeline on the contrary, surfaces tend to use sets of different textures that represent physical values rather than a desired artistic result. The diffuse color texture, which is the closest to what we commonly describe as “the color” of a surface, typically looks flat and uninteresting. The specular color is dictated by the surface index of refraction. Most of the detail and variety come from the normal and the roughness textures (which you could argue represent the same thing, but at two different scales). How reflective the surface feels just becomes a consequence of the roughness. At this point, it makes sense not to think in terms of textures anymore, but in terms of materials.
Greetings marble floor texture breakoff
Cobbles textures breakoff
Fountain scene in H – Immersion
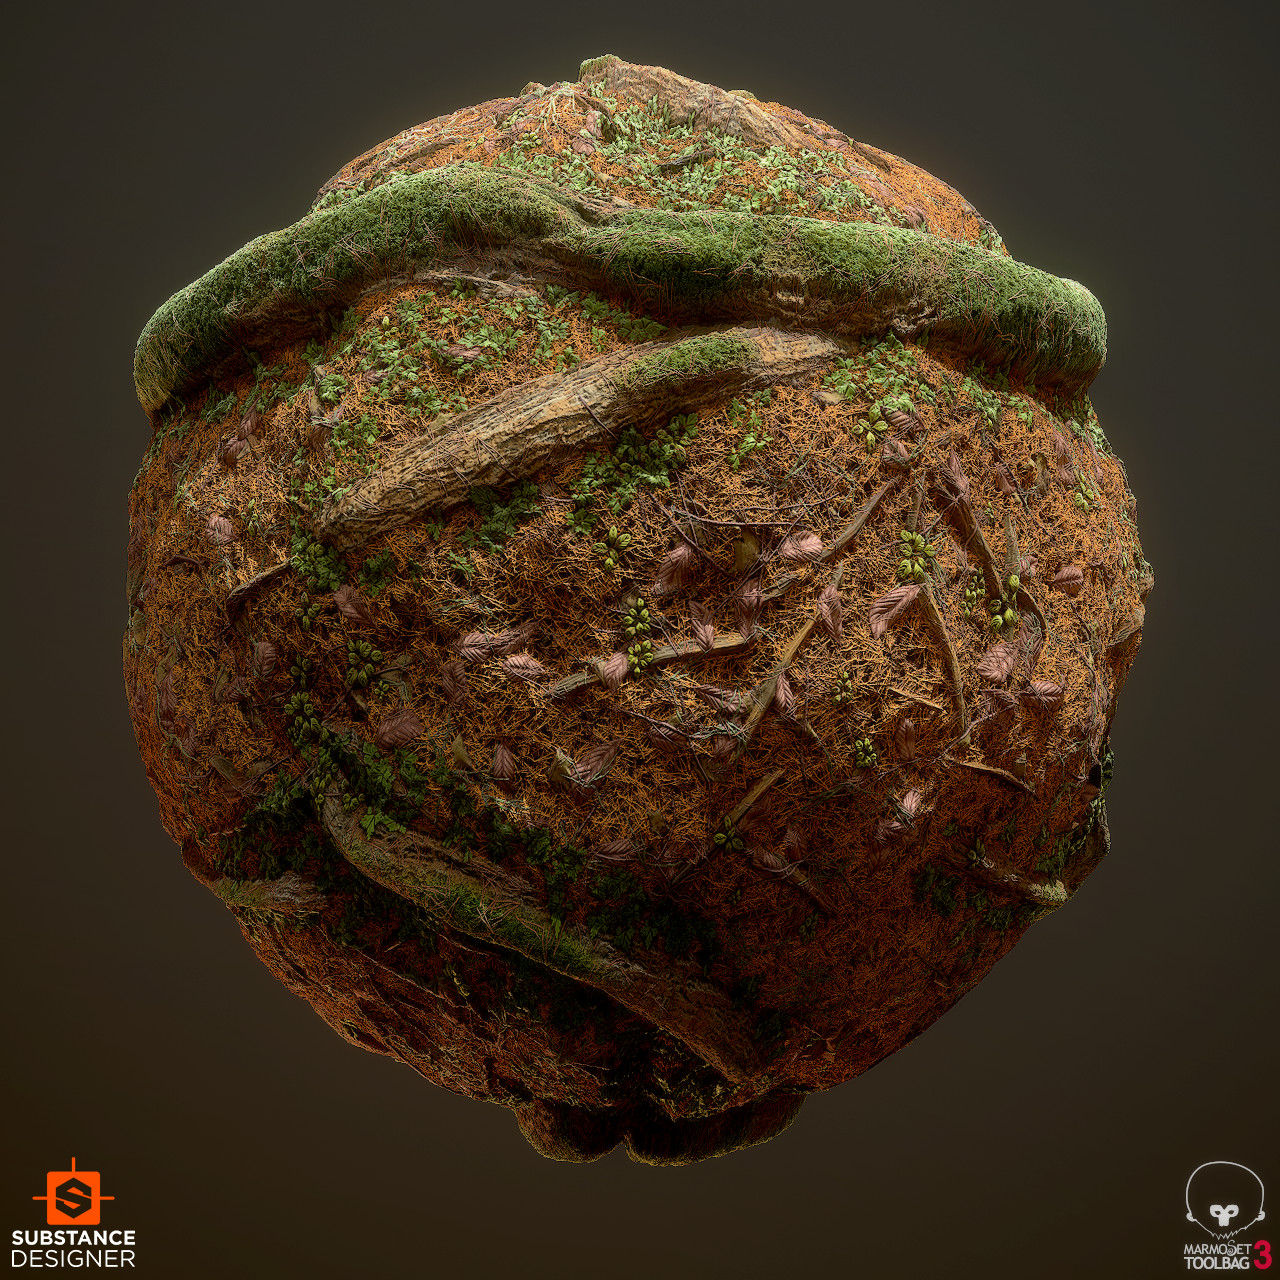
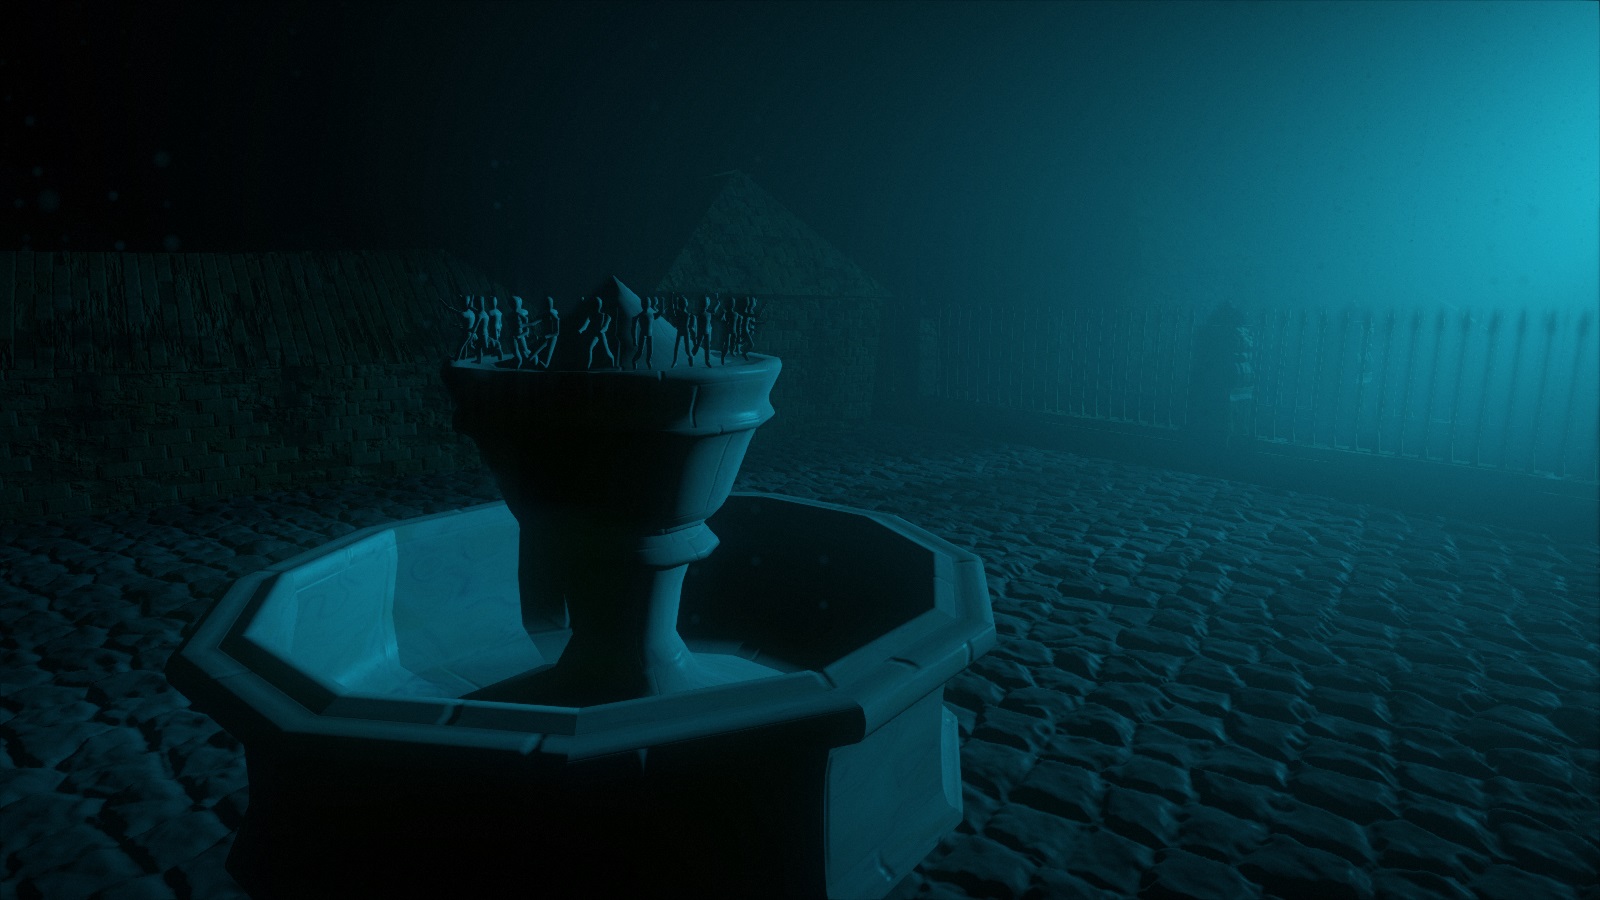
Seafloor textures breakoff
Seafloor scene in H – Immersion
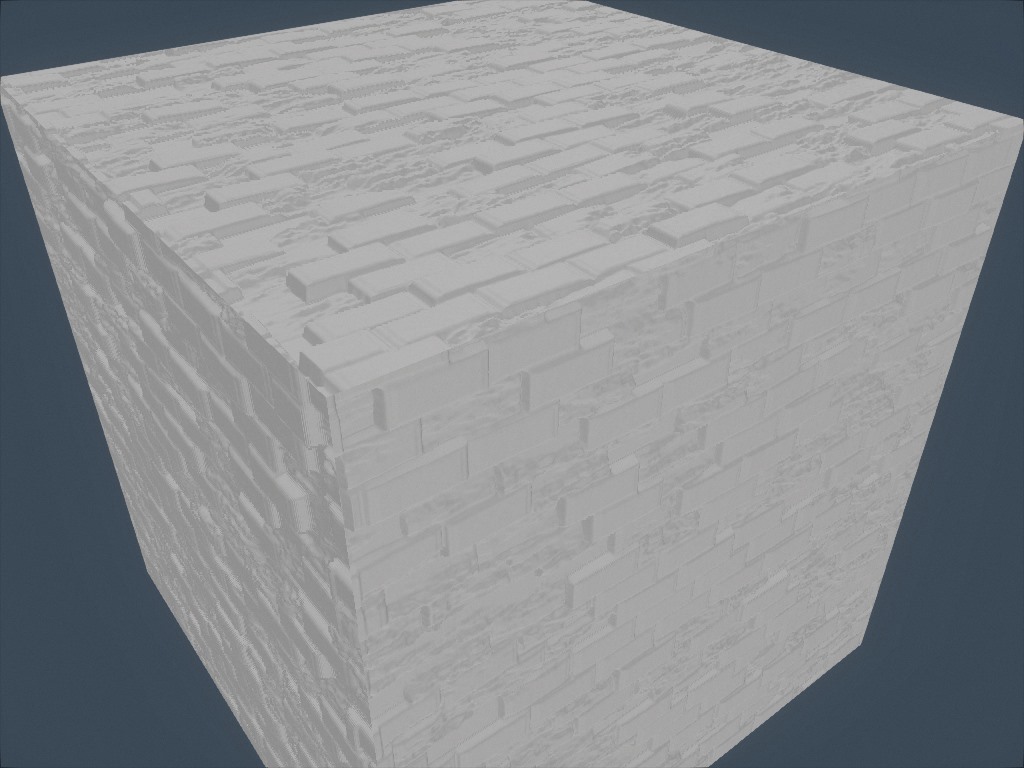
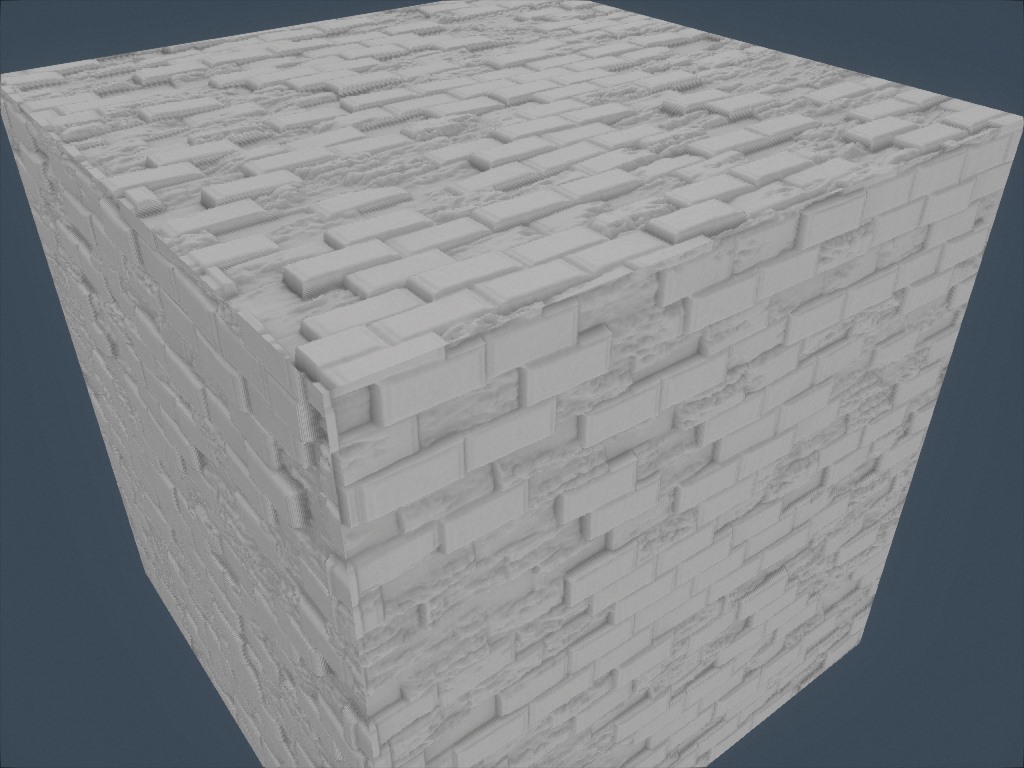
Old stone textures breakoff
Arch scene in H – Immersion
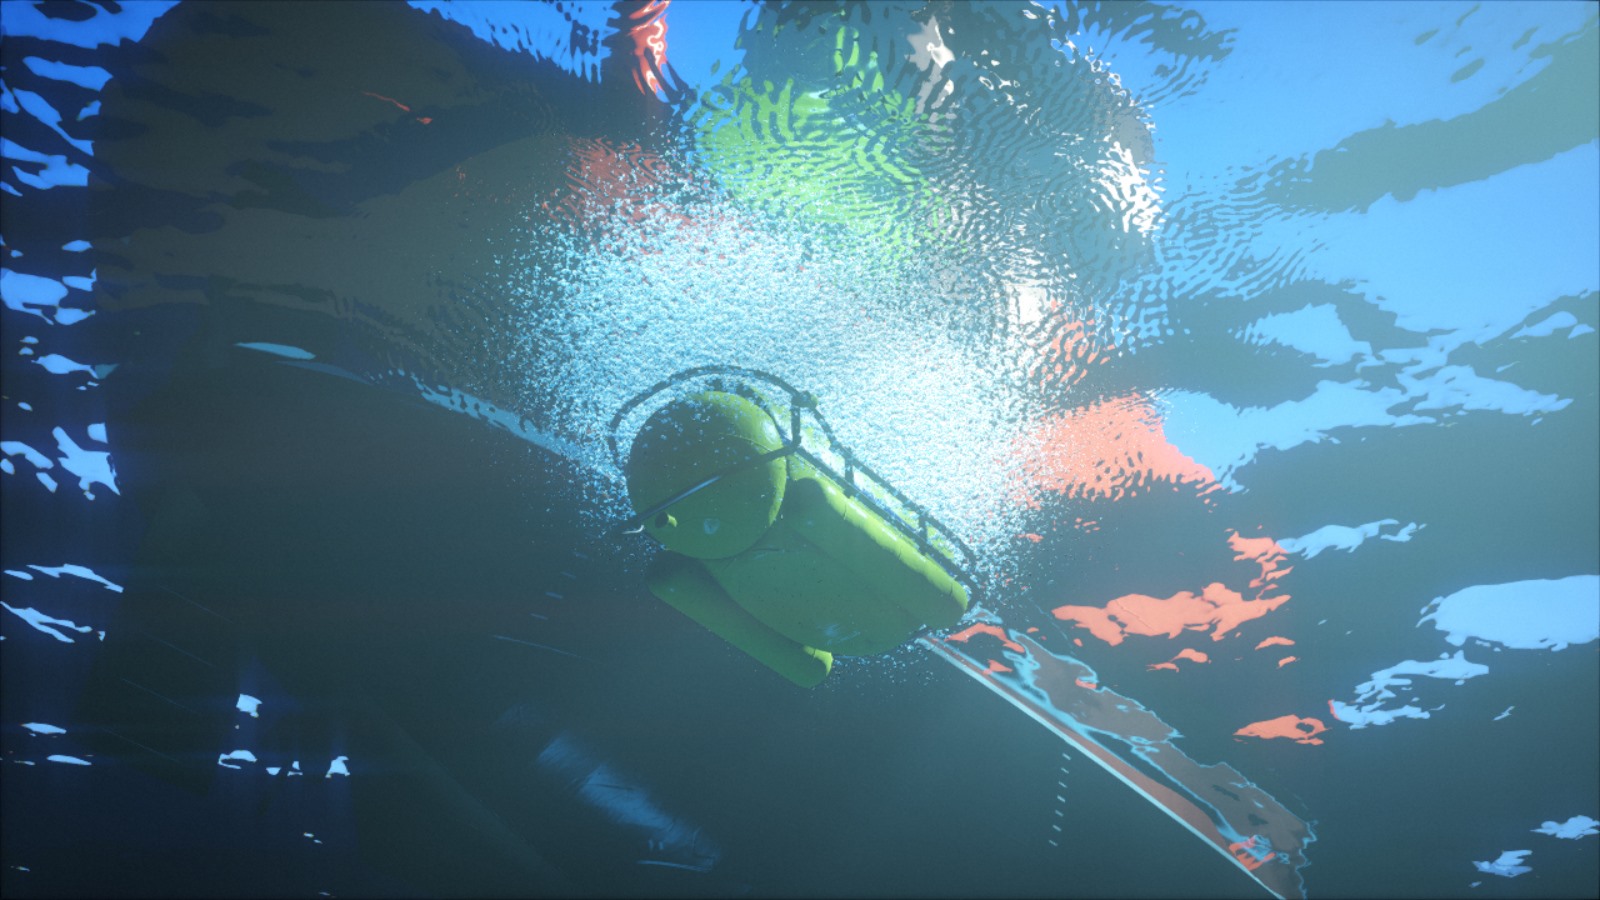
Submersible body texture breakoff
Launch scene in H – Immersion
The current design allows to declare arbitrary pixel formats for textures. By making it part of the API, we can have all the boilerplate taken care of. Once the pixel format is declared, we can focus on writing the creative code, without spending additional effort on processing that data. Upon execution, it will generate several textures and upload them to the GPU, transparently.
Some PBR workflows don’t directly expose diffuse and specular colors, but instead a “base color” and a “metalness” parameter, which have some advantages and some disadvantages. In H – Immersion we use a diffuse+specular model, and a material usually consists of 5 layers:
Relief elevation (A; used for parallax occlusion mapping).
When it was used, emissive detail was added directly in the shader. It didn’t seem necessary to have ambient occlusion either since most scenes didn’t have ambient light at all. It wouldn’t be surprising to have such additional layers though, or other kind of information like anisotropy or opacity for example.
Wall texture without ambient occlusion
Wall texture with ambient occlusion
Pictured here is a recent experiment at generating local ambient occlusion based on the height. For each direction, march a given distance and keep the biggest tangent (height difference divided by distance). Finally, compute occlusion from the average tangent.
Limitations and future work
As you can see, the current design is a strong improvement over the previous one, and it provides creative expressivity. However, it still has limitations that we would like to address in the future.
For example, although it wasn’t a problem for this intro, we noticed that memory allocation could be an obstacle. The generation of a texture uses a single array of floats. For large textures with many layers, this can quickly hit the point where allocation fails. There are various ways to address this, but they all come with drawbacks. For example we could generate the textures tile by tile, which would scale better, but some operations like convolution would become less straightforward to implement.
Finally in this article despite using the word “material”, we have only talked about textures and never about shaders. Yet a material should arguably encompass the shading part as well. This contradiction reflects the limitation of our current design: texture generation and shading are two distinct parts, separated by a bridge. We have tried to make that bridge as simple to cross as possible, but what we really want is to treat the two as a whole. For example, if a material has static features as well as dynamic ones, we want to describe them in a same place. This is a difficult topic and we don’t know yet what could be a good solution but, let’s go one step at a time.
An experiment in trying to create a fabric texture similar to the earlier texture by Imadol Delgado.
Next up: meshes
Now that we’ve talked about textures, we invite you to keep reading to learn about mesh generation.