In November 2022, we set ourselves a challenge: make a real-time animation that looks like a standard short animated movie, with the constraint that it should fit in 8 kilobytes. The goal was to have decent graphics, animations, direction and camera work, and the matching music… Yes, 8 kilobytes, less than half of this post, for everything. It wasn’t clear how much was actually feasible, so we had to try it.
In April 2023, after months of work, we finally released The Sheep and the Flower. You can run it by yourself (download link), or see a YouTube capture of the program running:
Many people asked how we were able to create something like this. This article will explain the technical details and design constraints behind this production. We’ve also made the source code public on GitHub.
Overview
The result is a Windows executable file. It’s a single .exe file that generates everything. It requires no resource file, no external depency, except for Windows and up-to-date drivers.
Here’s the quick summary of what we used. We’ll explain the details in the rest of the post.
- All the visuals are computed in real-time on the GPU, using GLSL shaders. This includes the timeline information, camera setup, etc.
- The rendering is done with raymarching.
- The shaders are minified using my own tool, Shader Minifier.
- The music was composed using OpenMPT and the 4klang synthesizer, which generates an assembly file able to replay the music. The instruments are described procedurally, while the list of notes is simply compressed.
- The code was written in C++ using Visual Studio 2022.
- To get started with the compiler flags and initialization, we used the Leviathan framework.
- The final output was compressed using Crinkler.
Genesis
One day, I saw a message from a former colleague, who shared a video he made a long time ago, called Capoda. I immediately loved the concept. The content is simple, yet it manages to tell a story efficiently.
I shared the link with some friends and thought it could be a good example of a story suitable for size coding. I was about to add this concept to the list of cool things I’ll probably never do, when Anatole replied:
Looks like a perfect fit for 8kb ! Will you do it? I have always dreamed of making a prod like this, but I’m waiting for the “good and original idea”.
I was excited by the project because I wanted to do more demos with story-telling and animations. At the same time, I was intrigued by the challenges of making something in 8kB: I usually target 64kB, which is a completely different world, with a different set of rules and challenges. For the music, I knew I could count on my old friend CyborgJeff. Anatole had a lot of experience with 4kB. With him, the project was much more likely to be successful. And that’s how we started working together. I was not certain it would be feasible to fit everything in 8kB, but there’s only one way to know, right?
Why specifically 8kB? In the demoscene, there are multiple size categories, with 4kB and 64kB being very common. I’ve always enjoyed the techniques used in 4kB intros (an intro is a demo with a tight size limitation), but it always feels too limited for proper storytelling. Revision, the biggest demoparty in the world, added an 8kB competition a few years ago, so it was a good opportunity to try it.
Rendering Worlds with Two Triangles
People familiar with the demoscene already know it, as this is a standard approach since 2008: we draw a rectangle (so, two triangles) to cover the full screen. Then, we run a GPU program (called a shader) on the rectangle using the GLSL language. The program will compute a color for each pixel and each frame. All we need is a function that takes coordinates (and time) as input, and returns a color. Simple, right?
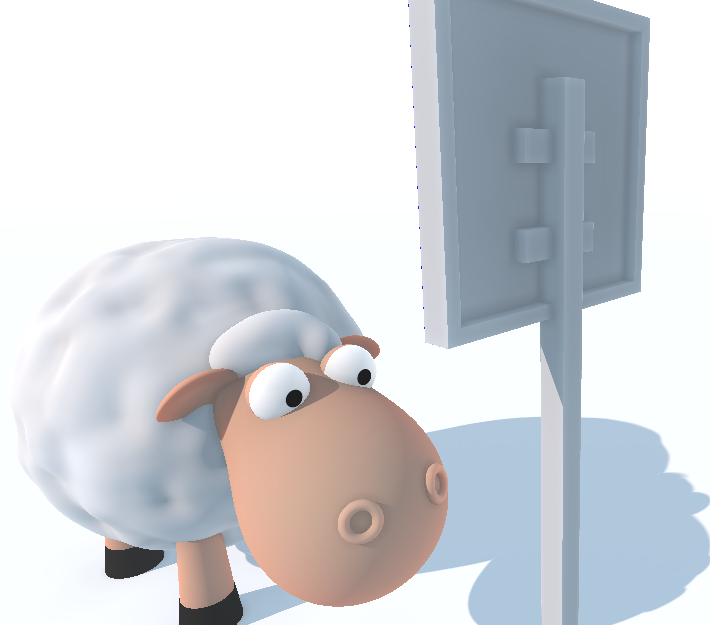
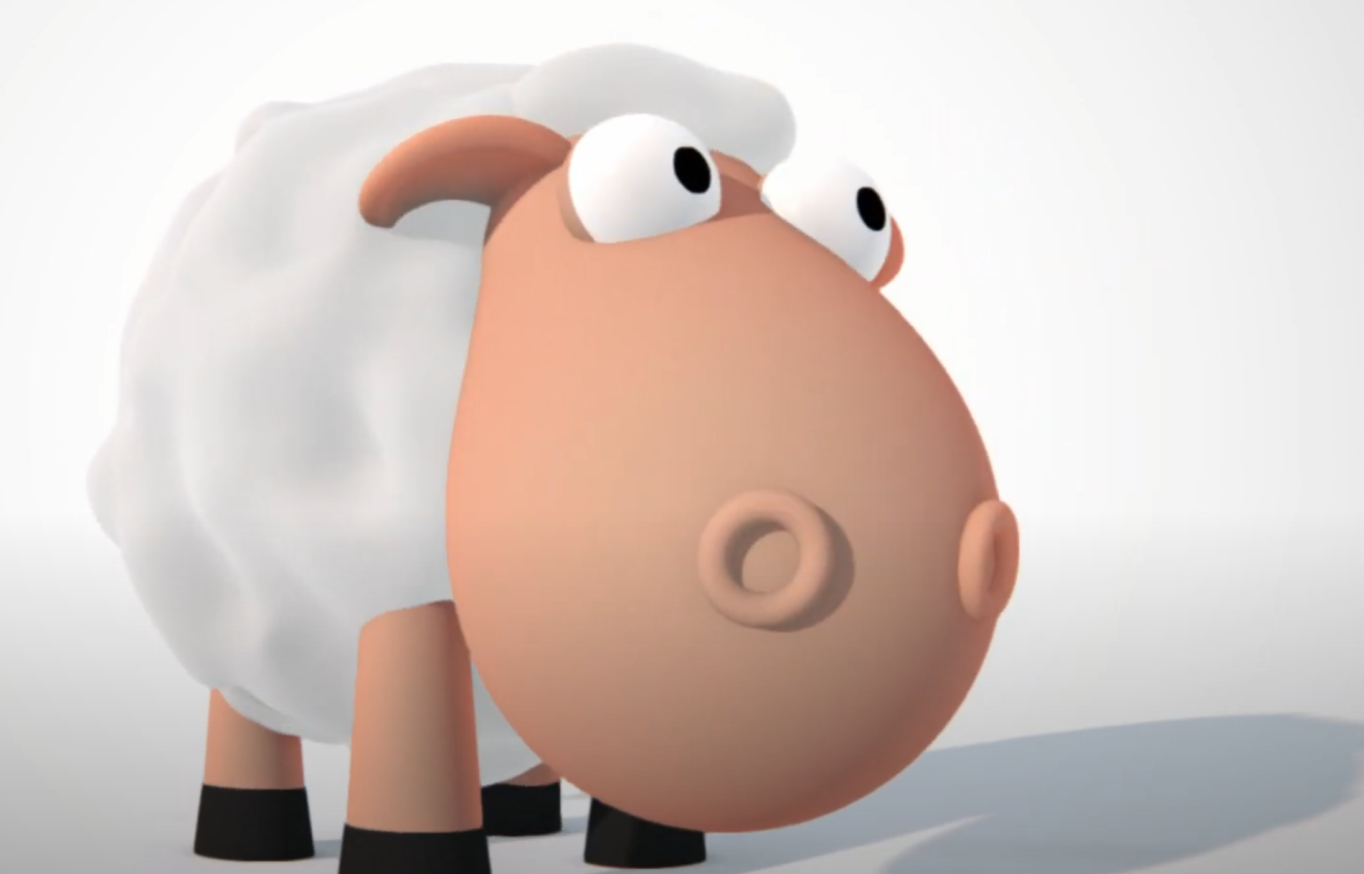
“Please draw me a sheep!” — Antoine de Saint-Exupéry, The Little Prince
Of course, the big question is: how do we write a function that draws a sheep?
Let’s split the problem in two parts:
- Represent the scene as a signed distance field.
- Use raymarching to convert the distance fields into pixels.
Signed Distance Fields (SDF)
A distance field is a function that computes the distance between a point in space to the nearest object. For every point in space, we want to know how far the point is to the object. If a point is one the object’s surface, the function should return 0. This is a “signed” function, meaning that it will return a negative number for points inside the object.
In the most basic cases, the function is simple to write. For example, the distance between a point and a sphere is trivial to compute. For a cube, you can also do it in a couple of lines (see The SDF of a Box for explanations). Lots of other building blocks have been documented. Inigo Quilez has a nice collection of simple reusable shapes and the Mercury demo group also provides a great library.
The true power of distance fields emerges when you combine them. To get the union of two objects, you can simply pick the minimum of the two distances, while the maximum gives the intersection. When crafting organic shapes, mathematical unions may appear coarse, but alternative formulas like the smooth unions can create more organic looks.
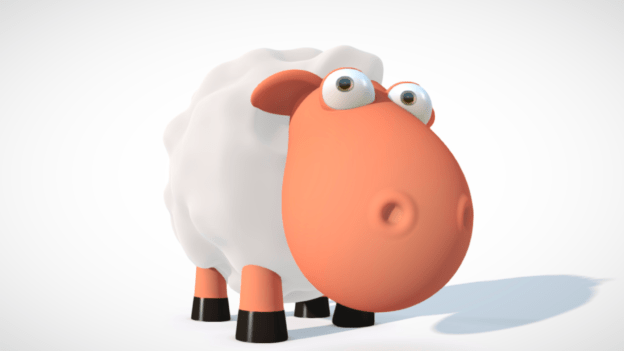
Once you have a toolset with building blocks, it feels like playing with legos to create an object or a scene. Thus we made our sheep by assembling simple shapes (for example a cone, a sphere) and merging them, while the body and wool consist of a 3D noise function.
The next task will be to actually render the distance function to the screen.
Raymarching
To draw the 3D scene on the screen, we use raymarching. Raymarching is a rendering technique that leverages SDFs to trace rays through a 3D scene. Unlike traditional ray tracing, which mathematically computes the intersection point, raymarching works by marching along the ray’s path. The SDF tells us how far we can walk without colliding with the scene. We can then move the ray origin and compute the new distance. We repeat the operation until the distance is 0 (or close to it).
In the image below, imagine that the ray origin is the camera. It is looking in a certain direction. After multiple iterations, we find the intersection point with the right wall.

Once we have the intersection point, we know if the current pixel should be a part of the sheep, the sky, or any other object. For the lighting, we need to know at least the surface normal, which we can estimate by computing the gradient in the same area. To compute shadows, we can send another ray for the point to the sun and find if an object is in between. Many techniques exist to improve the rendering quality beyond this basic idea.
To better understand the technical details, the tutorial “Ray Marching and Signed Distance Functions” is a good start. If you have more time, the video Live Coding “Greek Temple” is a wonderful in-depth example with detailed explanations.
Direction
Imagine that you have to tell a story, but there is only one character, with no voice or written text, and that character is barely animated. It can only walk (but not turn!), move the head and the eyes. With only this, how would you tell a story and convey emotions?
When creating a demo with such a small size limit, it’s critical to know what is important. We avoided anything that didn’t serve that story. For example, we originally imagined the sheep walking in a desert. It wouldn’t be hard to generate dunes and a sky, but the story didn’t actually need it. We decided to keep the pure white background. We also skipped the textures, except for a few that convey a meaning (like the signs and the eyes).
Keeping the scope of the work relatively small allowed us to focus on things that might not be obvious at first: the details and the polish, the camera work, the editing, and the synchronization. Each shot was manually crafted, each animation was adjusted and went through many iterations to make sure the flow feels right. Not only did we need to make sure the flow felt right (adjusting the length of the shots and the sequencing), but it had to match the music.
To ensure that the narrative resonates with the audience, we employed a number of storytelling techniques, often with redundancy for emphasis. For example, to show the sheep’s excitement, we used cartoonish 2D effects, accelerated the walking pace, accentuated tail movements, exaggerated head swings, and added a dramatic shift in the music. This approach allowed us to convey a spectrum of emotions throughout the story.
The camera itself is also a storytelling tool. We used a wide shot to evoke a sense of solitude when the sheep wanders for hours; an extreme closeup on its eyes to capture the moment of realization when it notices the sign; and a slow zoom on the head to intensify the focus when the sheep stares at a sign.
Development process
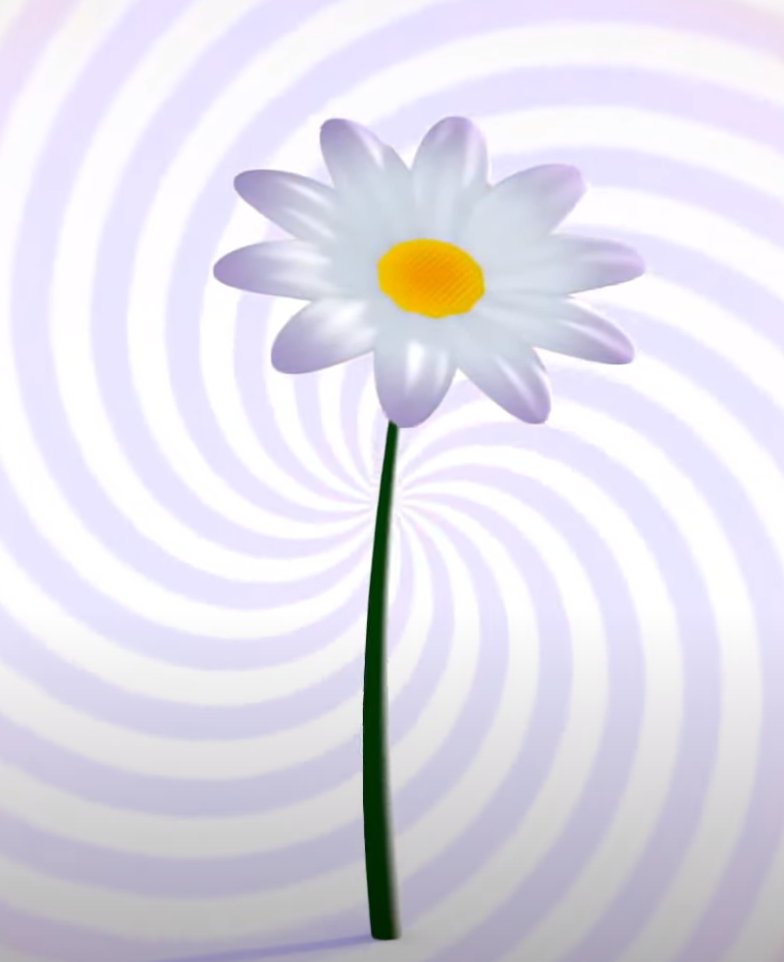
You may notice that the source code contains a large number of hard-coded constants. The challenge was to determine these values — how large should the sheep’s eyes be? How fast should the camera move? How long should each shot last? What colors should the flower have?
Given this uncertainty, each constant went through numerous iterations. To iterate quickly and have a short feedback loop, shaders come in handy: we recompile them at runtime to update the graphics within a second.
The other requirement was to have a player: something that allows us to control the time with pause and replay commands. This proved to be invaluable when working on animations and camera control, as we could see the result instantly after a live-reload of the shader. Additionally, music support was a must, so that we can perfectly synchronize the animations to the music.
We designed our early prototypes in Shadertoy, but we later transitioned to KodeLife, and finally moved the code to our own project (in C++, using a small framework called Leviathan).
Music
Music is a critical component for storytelling. To fit the story, the music needed multiple parts, with different moods and transitions at specific points in time. We decided to use the same tools as we would in a 4kB intro, while allocating more space to allow a more intricate composition.
To compose the music, I asked my Cyborgjeff, a friend familiar with demoscene techniques, whose musical style resonated with our vision. His tool of choice was the 4klang synthesizer, an impressive piece of software developed by Gopher. 4klang comes with a plugin usable from any music software and it has an export button that generates an assembly file. This file is then compiled and linked with the demo. When the demo runs, the synth will run in a separate thread, procedurally generate the wave sound, and send it to the soundcard.
Creating a small music comes with a lot of constraints. The first version of the music was bigger than expected. Imagine telling a musician “Your music is too big, can you reduce it by 500 bytes?” Well, that’s just normal in the demoscene.
We studied the output of 4klang to understand how it packs the data. With advice from Gopher, Cyborgjeff was able to iterate on the music to make it smaller. We made multiple adjustments:
- The number of instruments was reduced from 16 to 13.
- The ending theme was recomposed to align with the tempo of the overall music.
- The composition used more repetitions so it compresses better. For example, adjusting the length of a note in the background may be imperceptible to the ear while improving the compression ratio.
This allowed us to save some space on the music, while keeping its overall structure, with a minimal loss in terms of quality. For more information on the music, Cyborgjeff wrote a blog post: 8000 octets, un mouton et une fleur.
Animation & Synchronization
Everything in the demo is re-evaluated at each frame as nothing is precomputed or cached. While this is really bad for the performance, this is a blessing for animations: anything can depend on the time and vary through the demo.
The demo consists of around 25 manually crafted camera shots. When creating a shot, we describe how each of 18 parameters varies over time, such as the position of each object, the state of the sheep, the position of the camera, the focal, what the camera is looking at, etc.
For example, a single line of code describes the camera during the shot:
camPos = vec3(22., 2., time*0.6-10.);And we get a linear translation. Here “time” represents the time since the beginning of the shot so that we can easily insert, remove or adjust a shot without affecting the rest of the demo. Absolute times are avoided for code maintenance.
A note of caution on linear interpolations: while functional, they often look poor or robotic. In many cases, we apply the smoothstep function, which leads to a smoother, more natural animation. Smoothstep is an S-shaped smooth interpolation that helps avoid sharp edges and sudden movement changes.
The code for the timeline is in the vertex shader. You may notice that each shot is defined in a similar way, and the code may seem redundant. It’s not a problem, as redundancy leads to better compression.
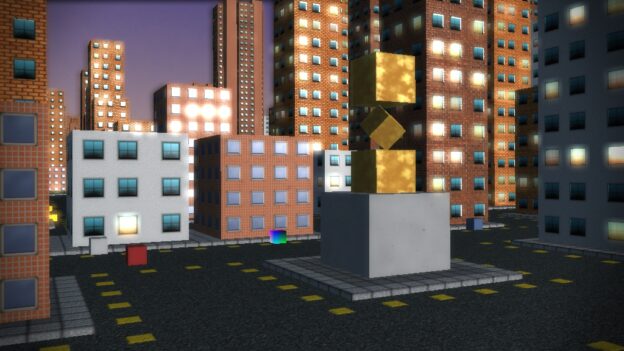
Textures & Materials
In a traditional renderer, textures are 2D images that are applied on a 3D model. One difficulty with the textures is how to compute the texture coordinates and map each pixel in the texture to the 3D surface. With our raymarching approach, we can’t easily compute texture coordinates. Instead, we compute on the fly 3D textures. Once the raymarcher finds the 3D position of the point to render, we pass the 3D coordinates to the corresponding texture function.
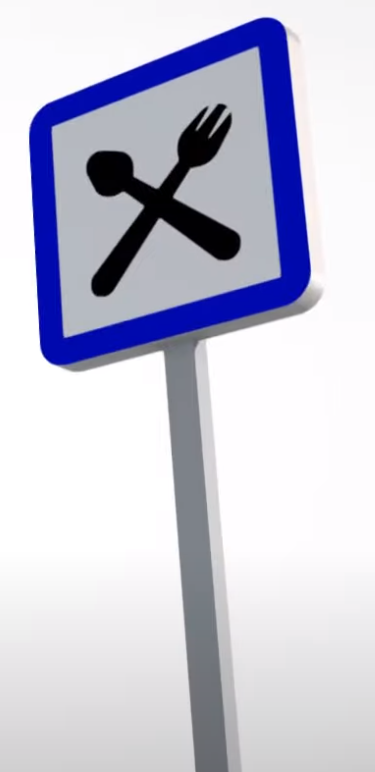
Let’s take a look at the traffic signs. They use some math to compute a triangle or a square to serve as a border, then the inner content of the sign is achieved by combining multiple functions. For example, the restaurant symbol is created with 4 black oval-like shapes, and 2 white shapes are added to create the dents.
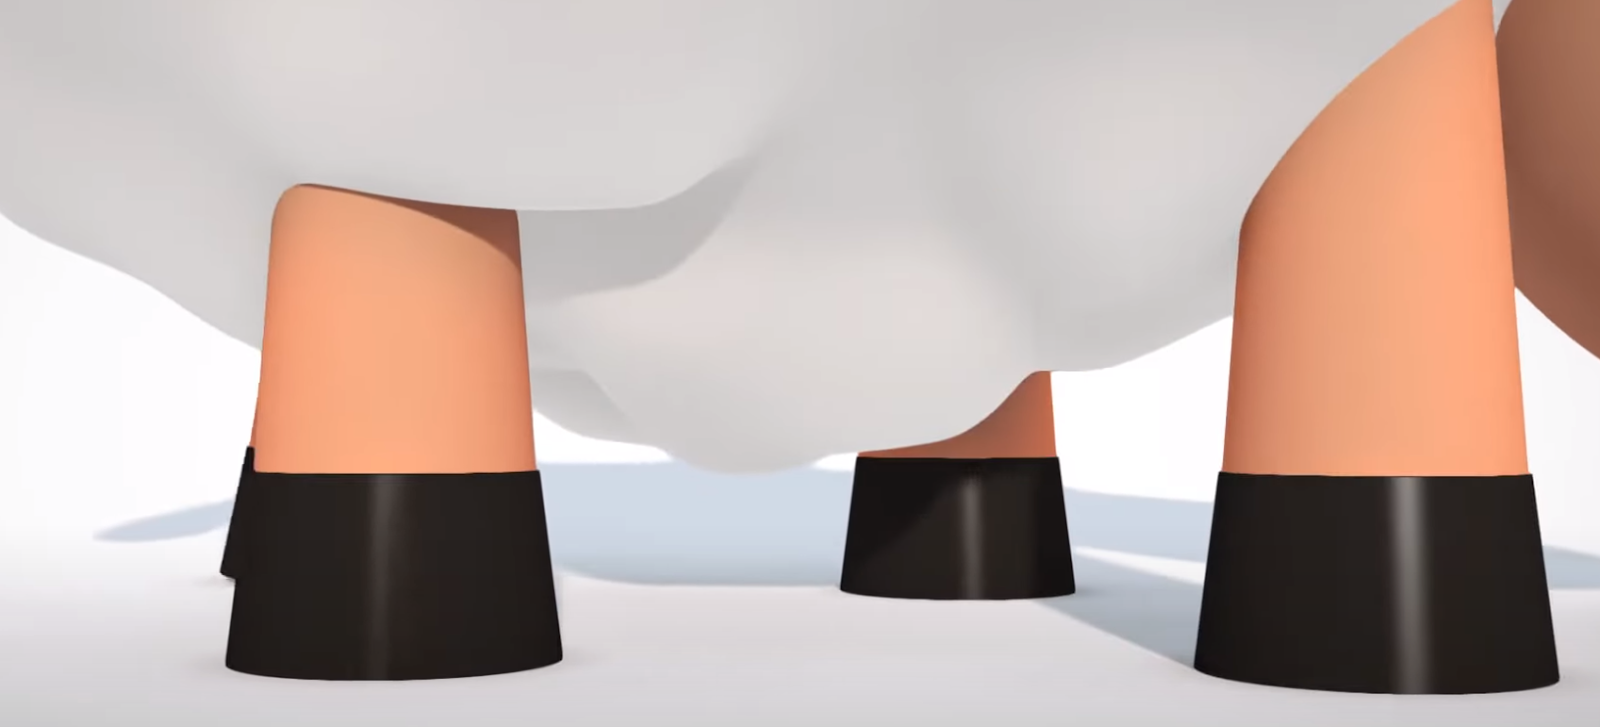
To make the visuals more interesting, we wanted to have not just textures, but also different materials. Parameters of the lighting equation depend on the material. For example, the sheep hooves have a different reflection (using fresnel coefficients).
Eyes
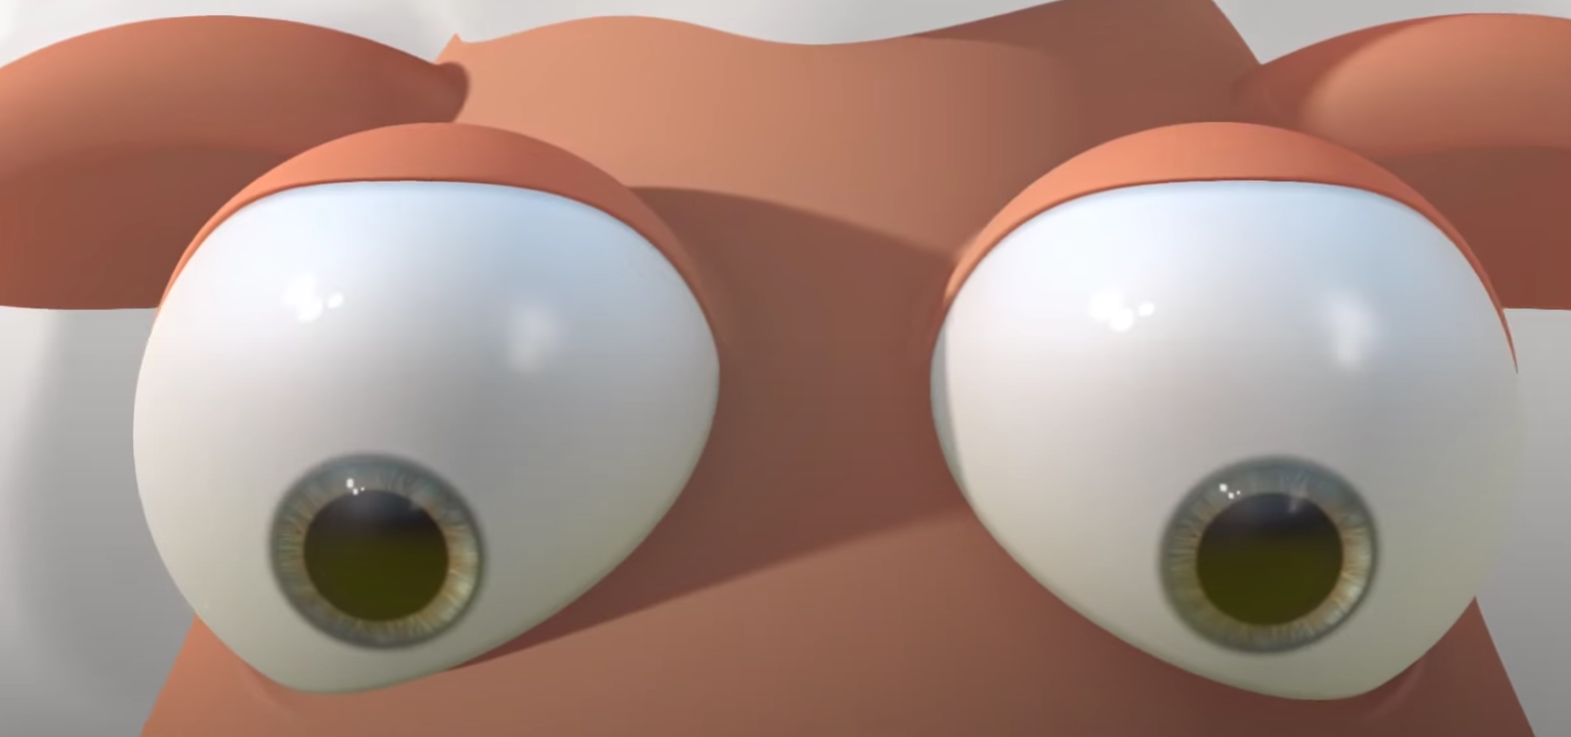
For a long time during the development, the eyes looked dull and lifeless. I believe eyes are a big part of the character design. This was one of the first things that we animated, and it was very important as a tool for story-telling. Eyes help show feelings and they enable many transitions.
After searching for reference images on the Internet, I found that most of the cartoon characters have an iris, but the iris doesn’t seem to be strictly required. I’ve also noticed that the pupil is always big. If there’s an iris, the pupil will be big compared to the iris.
But the important part to get sparkling eyes is to have some reflections of the light in the eyes. With the standard lighting equations we used, we couldn’t get a reflection (unless the sun and the camera were at very specific positions). An input of the lighting equations is the normal vector of the surface. Our trick was to modify the vector to increase the probability of getting some reflections from the sun.
On top of that, we created an environment mapping. This technique is commonly used in video games: instead of computing perfect reflections in the scene in real time, we can look up in a texture (that simulates the environment). Usually, people use environment mapping to optimize the code as the texture can be a simplification of the real environment. We did the opposite: our environment world is actually a perfect white, but we used a texture to fake and add details.
The reflections in the eyes (both the white and the pupils) are much more complex than they should be in an empty world. There are multiple fake sources of lights, as well as a gradient (to mimic a darker ground and a blue-ish sky).
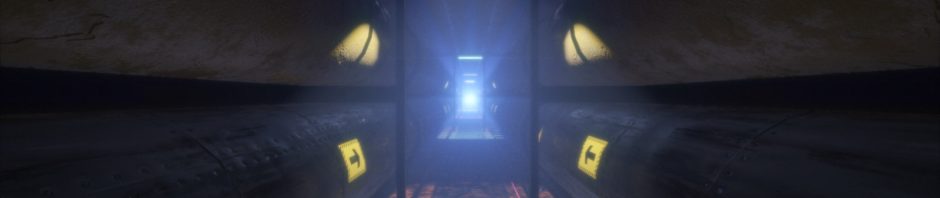
Post-processing
Once everything is done, the final visual touch defining the mood is the post-processing.
Despite being subtle, it helps have a good image quality and set the tone for the story. We used:
- color grading;
- gamma correction;
- a bit of vignetting;
- finally, a two-pass FXAA filter to avoid aliasing (but you won’t notice it if you only watched the YouTube capture)
We also implemented some of the effects in the post-processing step, such as the stars in the eyes or the ending screen effect. Those are made as pure 2D and don’t exist in the 3D world.
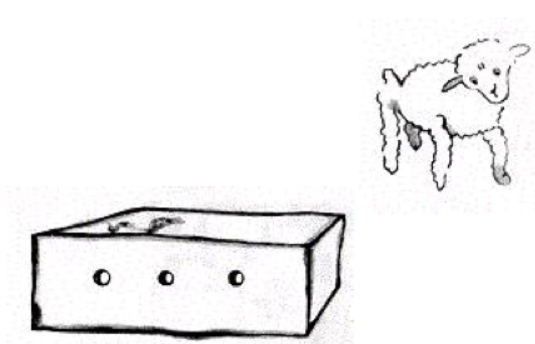
Finally, we experimented with other alternative styles. At some point, we tried to give an old-cartoon look, and we implemented contour detection to simulate a hand-drawn image, with a monochrome rendering, grain, and noise. The result looked like this:
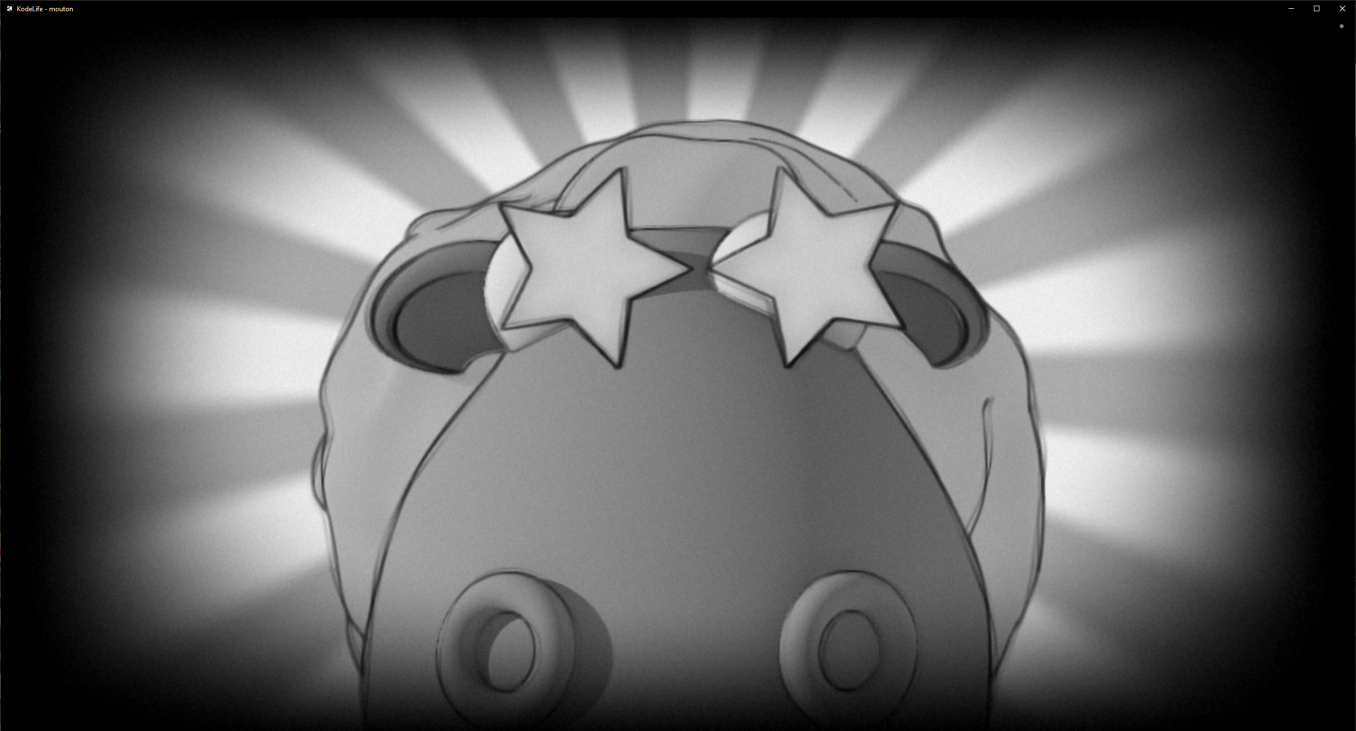
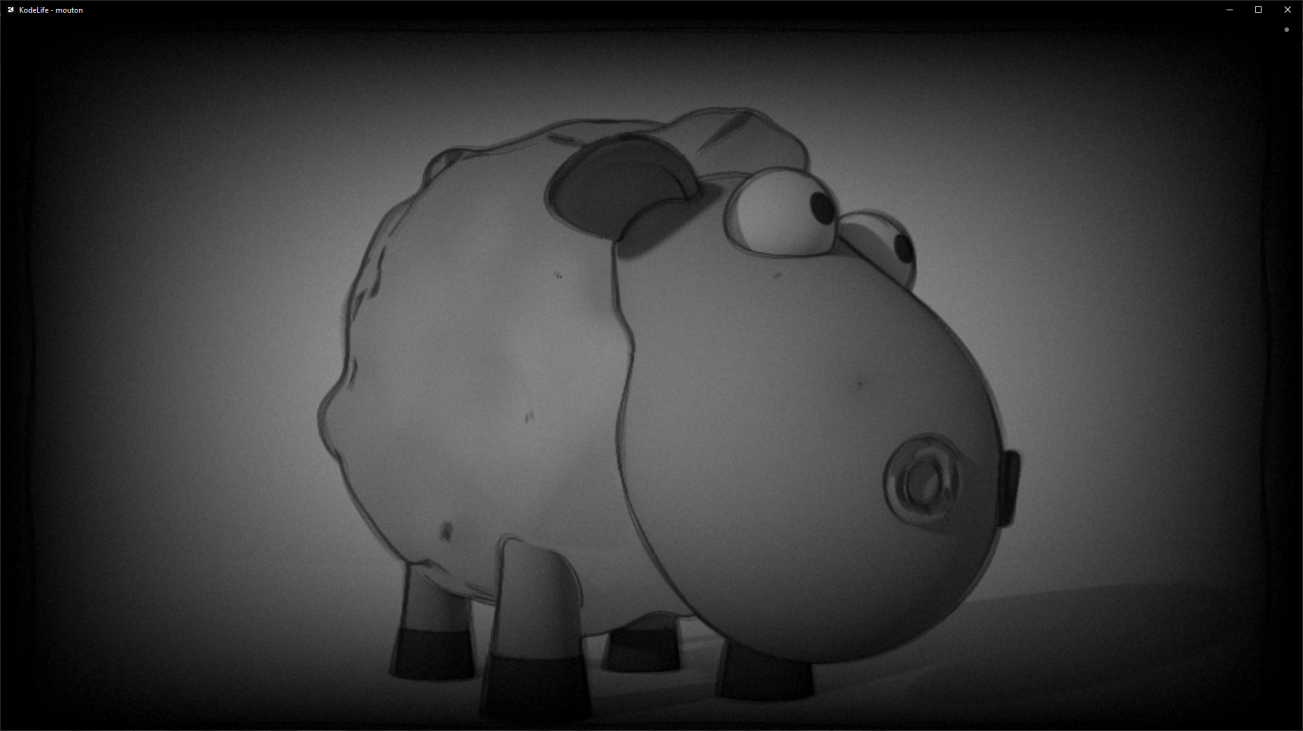
After discussions, we decided to give up on this experiment and focus on the cleaner, modern look.
Compression
So far, we’ve seen how we made most of the demo. The main idea is to avoid storing data, instead we use code to describe how to generate the data. For the music, we store a list of notes to play, as well as a list of instructions for each instrument. All of this is relatively small, but does it really fit in 8kB?
Part of the magic comes from Crinkler, a compression tool specifically designed for the demoscene and intros between 1kB and 8kB. As the executable needs to be self-extractible, Crinkler includes some very small and clever assembly code that can decompress the rest of the executable. It’s optimized for size at the expense of other things: the compression algorithm takes a while, the decompression is relatively slow and uses a lot of RAM (hundreds of megabytes).
Crinkler is an impressive tool, but it doesn’t do everything. We have a total of 42kB of shader source code and we need one last ingredient to fit it in the binary.
Minification
As the shader source code is included in the final binary, we have to make it as small as possible. It would be possible to minify the code by hand, but then it would cause maintenance issues. It was critical for the success of our project to be able to iterate quickly, without worrying about low-level size optimizations. So we needed a tool to minify the shader.
I have written such a tool, Shader Minifier, which has been a side project of mine since 2011. It removes unneeded spaces and comments, it renames variables and can do more. It has been the most popular shader minification tool in the demoscene for many years, but this was not sufficient for us: an 8kB intro contains much more code than a 4kB does, and new problems arise from the larger code size.
I stopped working on the demo for one month to implement all the missing features we needed from Shader Minifier. While it’s easy to write a simple minifier, you need to write a compiler if you want to get good minification — a source-to-source compiler, similar to what Closure Compiler does.
The full list of transformations supported by Shader Minifier is getting quite long, but here are a few:
- Renaming of variables and functions
- Inlining of variables
- Evaluation of constant arithmetic
- Inlining of functions
- Dead code elimination
- Merging of declarations
These transformations reduce the size of the output, but it’s not enough. We need to make sure that the output is compression-friendly. This is a hard problem: it can happen that a transformation reduces the size of the code, while increasing the size of the compressed code. So we constantly need to monitor the compressed size, as we iterate on the demo.
New improvements to Shader Minifier have saved around 600 bytes on the compressed binary. To help review and monitor what exactly goes in the final binary, we store the minified output in the repository. This proved useful to identify new optimization opportunities. At the end, once minified and compressed, the 42kB of shader code fits in about 5kB, which gives just enough space for the music and the C++ code.
Anyway… you could say that I had to write a compiler in order to make this demo. :)
The War Between the Sheep and the Flowers
It’s not important, the war between the sheep and the flowers? […] Suppose I happen to know a unique flower, one that exists nowhere in the world except on my planet, one that a little sheep can wipe out in a single bite one morning, just like that, without even realizing what he’d doing – that isn’t important? If someone loves a flower of which just one example exists among all the millions and millions of stars, that’s enough to make him happy when he looks at the stars. He tells himself ‘My flower’s up there somewhere…’ But if the sheep eats the flower, then for him it’s as if, suddenly, all the stars went out. And that isn’t important?”
— Antoine de Saint-Exupéry, The Little Prince
Conclusion
As you’ve seen, there are lots of advanced and fascinating techniques needed to make this kind of demo. But we didn’t invent everything. We’re building on top of what other people did. The amount of work and research that was done by other people is incredible, from the raymarching techniques, to the music generation software and the compression algorithms. Hopefully the new features added to Shader Minifier will help other people create better demos in the future. The 8kB category is fun and offers more possibilities than the 4kB category; let’s hope it will become more popular.
P.S. For comparison, the text of this article contains around 21,000 characters, so it would take 21kB.